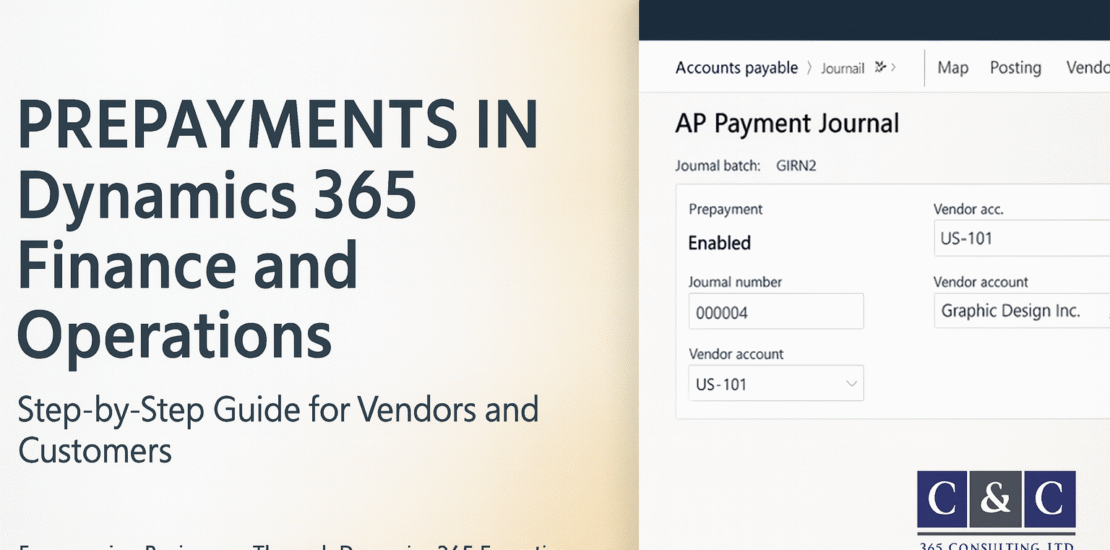
Prepayments in Dynamics 365 Finance and Operations: A Step-by-Step Guide for Vendors and Customers
- October 29, 2025
- Posted by: Christian Ngah
- Category: Christian Ntanyele Ngah
Introduction
Managing prepayments accurately is critical for financial transparency and control. Whether you are paying suppliers in advance or receiving deposits from customers, Dynamics 365 Finance and Operations (D365 F&O) provides a structured way to record and apply these transactions using prepayment posting profiles and payment journals.
In this guide, you will learn how to:
-
Configure Prepayment Posting Profiles for both Accounts Payable (AP) and Accounts Receivable (AR)
-
Map these profiles in module parameters
-
Post vendor and customer prepayments
-
Settle prepayments against invoices
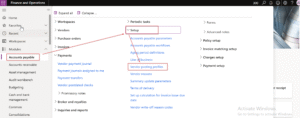
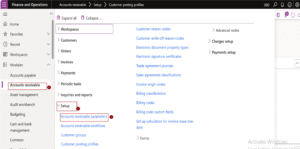
Step 1: Create Prepayment Posting Profiles in AP and AR
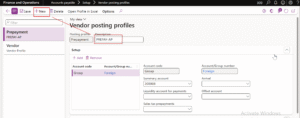
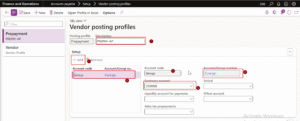
1A. Accounts Payable Prepayment Profile
-
Navigate to Accounts Payable > Setup > Posting > Posting Profiles
-
Click New and name the profile (for example, PREPAY-AP)
-
Under Summary account, select your Prepayments to Suppliers general ledger account
-
Click Save
Why this step matters: This ensures that vendor prepayments are posted to a dedicated asset account instead of the normal trade payable account.
1B. Accounts Receivable Prepayment Profile
-
Navigate to Accounts Receivable > Setup > Posting > Posting Profiles
-
Select New and name the profile (for example, PREPAY-AR)

-
In Summary account, select Prepayments from Customers general ledger account

-
Click Save
Why this step matters: This separates customer prepayments from standard receivables for clear financial reporting.
Step 2: Map Prepayment Profiles in Parameters
2A. Accounts Payable Parameters
-
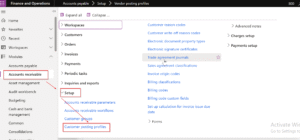
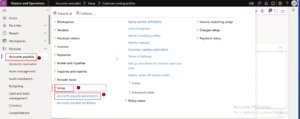
Go to Accounts Payable > Setup > Accounts Payable Parameters
-
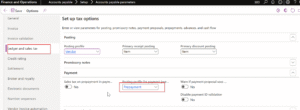
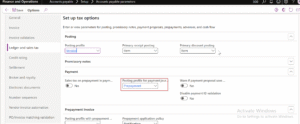
Under the Ledger and Sales Tax or Prepayment tab, find the field Prepayment Posting Profile
-
Select the PREPAY-AP profile
-
Click Save
Add screenshot: Accounts Payable Parameters showing PREPAY-AP selected
2B. Accounts Receivable Parameters
-
Navigate to Accounts Receivable > Setup > Accounts Receivable Parameters
-
Locate Prepayment Posting Profile

-
Select PREPAY-AR
-
Click Save
Add screenshot: Accounts Receivable Parameters showing PREPAY-AR selected
Tip: Mapping the correct posting profiles ensures the system automatically picks the right ledger accounts when prepayments are posted.
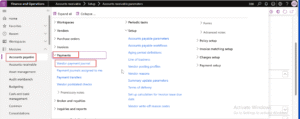
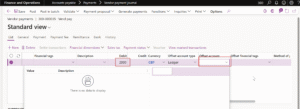
Step 3: Post a Vendor Prepayment
-
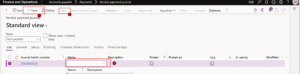
Go to Accounts Payable > Payments > Payment Journal
-
Click New, Select Journal Name, then select Lines
-
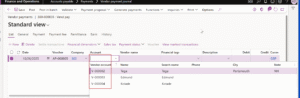
Set Account type = Vendor, and choose the vendor account
-
Enter the amount and Offset account = Bank
-
In the Line details section, toggle Prepayment = Yes
-
Validate and Post the journal
Result: The vendor prepayment is recorded as an advance payment, posted to the prepayment account.
Step 4: Post a Customer Prepayment
-
Go to Accounts Receivable > Payments > Payment Journal
-
Create a new journal, then click Lines
-
Set Account type = Customer, and select the customer account
-
Enter the amount received and set Offset account = Bank
-
Toggle Prepayment = Yes
-
Validate and Post
Result: The customer prepayment is posted as an advance receipt, separate from standard receivables.
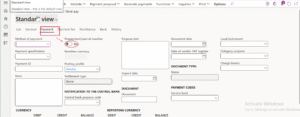
Step 5: Settle the Prepayment Against the Invoice
5A. Vendor Settlement
-
Post the vendor invoice in Accounts Payable > Invoices > Invoice Journal
-
Go to Accounts Payable > Vendors > All Vendors
-
Select the vendor, navigate to Collect > Settle Transactions
-
Mark both the Prepayment and the Invoice
-
Verify the Amount to Settle and click Post
The vendor prepayment is now applied to the invoice, reducing the outstanding payable balance.
5B. Customer Settlement
-
Post the customer invoice (via Sales Order or Free Text Invoice)
-
Go to Accounts Receivable > Customers > All Customers
-
Select the customer, navigate to Collect > Settle Transactions
-
Mark both the Prepayment and the Invoice
-
Verify the settlement amounts and click Post
The prepayment is applied to the invoice, reducing the customer’s outstanding receivable balance.
Best Practices and Common Pitfalls
-
Use separate accounts for prepayments to maintain accurate reporting
-
Check VAT treatment for prepayments, as rules vary by country
-
Enable journal workflows for approval and control of prepayments
-
Use reports or Power BI dashboards to monitor open prepayments
-
Handle partial applications carefully, the system allows partial settlements
-
Validate exchange rates for foreign currency prepayments
Quick Navigation Reference
| Task | Navigation Path |
|---|---|
| AP Posting Profiles | Accounts Payable > Setup > Posting > Posting Profiles |
| AR Posting Profiles | Accounts Receivable > Setup > Posting > Posting Profiles |
| AP Parameters | Accounts Payable > Setup > Accounts Payable Parameters |
| AR Parameters | Accounts Receivable > Setup > Accounts Receivable Parameters |
| Vendor Prepayment | Accounts Payable > Payments > Payment Journal |
| Customer Prepayment | Accounts Receivable > Payments > Payment Journal |
| Settlement | Vendor/Customer > Collect > Settle Transactions |
Frequently Asked Questions (FAQ)
Q1. Why do we need separate posting profiles for prepayments?
It keeps prepayments distinct from trade payables and receivables, ensuring a clean trial balance and easier reconciliations.
Q2. Can I post a prepayment directly from a Purchase Order?
Not directly. You must post through a Payment Journal, enabling the Prepayment option.
Q3. What if the prepayment exceeds the invoice amount?
You can settle part of the prepayment and carry the balance forward or issue a refund.
Q4. How does VAT work on prepayments?
VAT rules differ by jurisdiction. Some countries require VAT at the time of payment, others at the invoice stage. Always verify with your tax setup.
Q5. Can I automate approvals for prepayment journals?
Yes, enable journal workflow approvals for both vendor and customer payment journals.
Q6. How do I report open prepayments?
Use the Vendor or Customer transactions list, filter by transaction type = Prepayment, or create a Power BI dashboard for live reporting.
Conclusion
Prepayments are an essential part of managing supplier and customer relationships in Dynamics 365 Finance and Operations. When configured correctly, they streamline accounting, reduce reconciliation errors, and maintain financial transparency.
Following this step-by-step guide ensures your prepayment process is fully automated, from configuration to posting and settlement.
Add screenshots throughout for visual guidance — they enhance understanding and documentation quality.
For expert guidance on D365 Finance implementations, training, or workflow automation, contact CC365 Consulting — your trusted Dynamics 365 Finance partner.
Next Steps
-
Explore our Dynamics 365 Finance Training Programs → Learn more
-
Read more articles like this on our Knowledge Hub
-
Follow CC365 Consulting on LinkedIn for more D365 insights